Quantcast
Channel: Marcus' Macro Scheduler Blog
Viewing all 184 articles
Browse latest View live

Season’s Greetings!

$
0
0

From all of us at MJT we wish you season’s greetings and a wonderful start to 2019.

Here’s a fun little script with a message from Macro Scheduler. Open Macro Scheduler (download the trial if you don’t already have it), click New to create a new macro and paste this code in and hit run.

OnEvent>key_down,VK27,0,Quit
SRT>Quit
  SetControlText>Sparkler,TEdit,1,Complete
  WaitWindowClosed>Sparkler
  Wait>1
  DeleteFile>%temp_dir%\Sparkler.scp
  Exit>0
END>Quit
 
DeleteFile>%temp_dir%\Sparkler.scp
LabelToVar>SparkleScript,vScrData
WriteLn>%temp_dir%\Sparkler.scp,wres,vScrData
 
Dialog>Dialog1
object Dialog1: TForm
  BorderStyle = bsNone
  Caption = 'Happy Holidays'
  ClientHeight = 330
  ClientWidth = 780
  Color = 111111
  Position = poScreenCenter
  object Panel3: TPanel
    Left = 0
    Top = 0
    Width = 780
    Height = 330
    BevelEdges = []
    BevelOuter = bvNone
    Caption = 'And a Happy New Year'
    Color = 111111
    Font.Charset = ANSI_CHARSET
    Font.Color = clRed
    Font.Height = -80
    Font.Name = 'Vladimir Script'
    Font.Style = []
    ParentFont = False
    Visible = False
  end
  object Panel2: TPanel
    Left = 0
    Top = 0
    Width = 780
    Height = 330
    BevelEdges = []
    BevelOuter = bvNone
    Caption = 'Merry Christmas'
    Color = 111111
    Font.Charset = ANSI_CHARSET
    Font.Color = clRed
    Font.Height = -96
    Font.Name = 'Old English Text MT'
    Font.Style = []
    ParentFont = False
  end
  object Panel1: TPanel
    Left = 0
    Top = 0
    Width = 780
    Height = 330
    BevelEdges = []
    BevelOuter = bvNone
    Caption = ''
    Color = 111111
  end
end
EndDialog>Dialog1
 
Show>Dialog1
 
ExecuteFile>%temp_dir%\Sparkler.scp
 
Let>WIN_USEHANDLE=1
  GetWindowPos>Dialog1.handle,Dia1X,Dia1Y
Let>WIN_USEHANDLE=0
Add>Dia1Y,165
Let>StartY=Dia1Y
Let>YFlag=1
Wait>0.3
 
Let>kk=0
Repeat>kk
  Add>kk,4
  If>Dia1Y>{%StartY%+20}
    Let>YFlag=0
  EndIf
  If>Dia1Y<{%StartY%-20}
    Let>YFlag=1
  EndIf
  Add>Dia1X,4
  If>YFlag=1
    Add>Dia1Y,8
  Else
    Sub>Dia1Y,8
  EndIf
  Wait>0.025
  If>Dia1X>40
    SetControlText>Sparkler,TEdit,1,%Dia1X%;%Dia1Y%
  EndIf
  SetDialogProperty>Dialog1,Panel1,Left,kk
Until>kk>750
 
Timer>Begin
 
GetWindowPos>Sparkler,SparkX,SparkY
 
Label>Loop
If>{%Dia1X%<%SparkX%+150}
  Add>Dia1X,1
EndIf
If>Dia1Y>StartY
  Sub>Dia1Y,1
EndIf
If>Dia1YDia1Y,1
EndIf
SetControlText>Sparkler,TEdit,1,%Dia1X%;%Dia1Y%
Wait>0.01
Timer>Stop
If>{%Stop%-%Begin%>5000}
  GoSub>Fade
EndIf
Goto>Loop
 
SRT>Fade
  SetDialogProperty>Dialog1,,AlphaBlend,True
  Let>Fader=255
  Repeat>Fader
    Sub>Fader,5
    SetDialogProperty>Dialog1,,AlphaBlendValue,Fader
    Wait>0.1
  Until>Fader<0
  Let>Fader=255
  SetDialogProperty>Dialog1,Panel3,Visible,True
  SetDialogProperty>Dialog1,Panel2,Visible,False
  SetDialogProperty>Dialog1,,AlphaBlendValue,Fader
  Wait>3
  Timer>Begin
  GetScreenRes>ScreenX,ScreenY
  While>{%Stop%-%Begin%<10000}
    Timer>Stop
    Random>100,Pct
    Add>pct,1
    Let>Dia1X={round(%ScreenX%*(%pct%/100))}
    Random>100,Pct
    Add>pct,1
    Let>Dia1Y={round(%ScreenY%*(%pct%/100))}
    SetControlText>Sparkler,TEdit,1,%Dia1X%;%Dia1Y%
    Sub>Fader,5
    SetDialogProperty>Dialog1,,AlphaBlendValue,Fader
    Wait>0.2
  EndWhile
  SetControlText>Sparkler,TEdit,1,Complete
  WaitWindowClosed>Sparkler
  Wait>1
  DeleteFile>%temp_dir%\Sparkler.scp
   
  Exit>0
END>Fade
 
/*
SparkleScript:
Let>size=200
 
OnEvent>key_down,vk27,0,Quit
 
SRT>Quit
  Exit>0
END>Quit
 
Dialog>Dialog2
object Dialog2: TForm
  BorderStyle = bsNone
  Caption = 'Sparkler'
  Color = 1
  TransparentColor = True
  TransparentColorValue = 1
  object Panel1: TPanel
    Left = 0
    Top = 0
    BevelOuter = bvNone
    Caption = 'Panel1'
    Color = 1
    TabOrder = 0
  end
  object Edit1: TEdit
    Text = '-1000;-1000'
    Visible = False
  end
end
EndDialog>Dialog2
 
Let>WIN_USEHANDLE=1
  MoveWindow>Dialog2.handle,-1000,-1000
Let>WIN_USEHANDLE=0
AddDialogHandler>Dialog2,,OnClose,Quit
SetDialogProperty>Dialog2,,ClientHeight,size
SetDialogProperty>Dialog2,,ClientWidth,size
SetDialogProperty>Dialog2,Panel1,Height,size
SetDialogProperty>Dialog2,Panel1,Width,size
SetDialogProperty>Dialog2,,AlphaBlend,True
SetDialogProperty>Dialog2,,AlphaBlendValue,0
Show>Dialog2
 
Let>halfSize={round(%size%/2)}
Let>85Per={round(%halfSize%*0.85)}
Let>15Per={round(%halfSize%*0.15)}
Let>ang2=0
Let>kk=0
SetDialogProperty>Dialog2,,AlphaBlendValue,255
Repeat>kk
  GetDialogProperty>Dialog2,Edit1,Text,vPos
  If>vPos=Complete
    Let>kk=-100
    Goto>Done
  EndIf
  Separate>vPos,;,Cur
  Sub>Cur_1,%halfSize%
  Sub>Cur_2,%halfSize%
  MoveWindow>Sparkler,Cur_1,Cur_2
  Add>kk,1
  Random>85Per,res
  Add>res,%15Per%
  Random>50,color
  Add>Color,45500
  Random>90,ang2
  Let>ang2=%ang2%*4
  GoSub>Angle,Dialog2,Panel1,ang2,%halfSize%,%halfSize%,%halfSize%,4,1
  Random>90,ang3
  Let>ang3=%ang3%*4
  GoSub>Angle,Dialog2,Panel1,ang3,%halfSize%,%halfSize%,%halfSize%,4,1
  Random>90,ang
  Let>ang=%ang%*4
  SetDialogProperty>Dialog2,Panel1,caption,space
  GoSub>Angle,Dialog2,Panel1,ang,%halfSize%,%halfSize%,res,2,color
  Label>Done
Until>kk<0
 
//Angle Usage:
//GoSub>Angle,Dialog,Object,Angle(in degrees),XStart,YStart,Length,PenSize,PenColor
//Requires Drawline subroutine
SRT>Angle
  Let>DegreeAngle=Angle_var_3
  Let>XStart=Angle_var_4
  Let>Ystart=Angle_var_5
  Let>LineLength=Angle_var_6
  Let>RadAngle={%DegreeAngle%*(pi/180)}
  Let>XEnd={trunc((cos(%RadAngle%))*%LineLength%)}
  Let>YEnd={trunc((sin(%RadAngle%))*%LineLength%)}
  Let>XEnd=%XEnd%+%XStart%
  Let>YEnd=%YEnd%+%YStart%
  GoSub>DrawLine,%Angle_var_1%.%Angle_var_2%.Handle,Angle_var_7,Angle_var_8,XStart,YStart,XEnd,YEnd
END>Angle
 
SRT>DrawLine
  LibFunc>user32,GetDC,HDC,%DrawLine_var_1%
  LibFunc>gdi32,CreatePen,Penres,0,%DrawLine_var_2%,%DrawLine_var_3%
  LibFunc>gdi32,SelectObject,SOPres,hdc,Penres
  Libfunc>gdi32,MoveToEx,mtres,HDC,%DrawLine_var_4%,%DrawLine_var_5%,0
  LibFunc>gdi32,LineTo,ltres,hdc,%DrawLine_var_6%,%DrawLine_var_7%
  LibFunc>gdi32,DeleteObject,DOres,Penres
  LibFunc>user32,ReleaseDC,RDCres,HDC_1,HDC
END>DrawLine
*/

Thanks to Dick Lockey for writing this little script (back in 2014).

Remember this?
Case Study: Macro Scheduler Saves 3600 Elf-Hours and Gets Presents Delivered On Time

The post Season’s Greetings! appeared first on Marcus' Macro Scheduler Blog.


PrettifyScp – Code Clean Up

$
0
0

I often end up working on Macro Scheduler code that is hard to read because of a lack of indentation. Sometimes this is simply because the code has been chopped and changed so many times it’s become a bit messy and needs a bit of a clean up. And I’m not pointing fingers here either – some of this code is my own!

Indenting code inside code blocks makes it much easier to read. But cleaning up code and sorting out the indentation manually is tedious. So I wrote a little script to do it!

So here is my first PrettifyScp script. Just run it and browse to the .scp file you want to fix up. Wait a few seconds and it will pop up a message when it’s done.

//tokens to identify start and end of indented code
Let>incTokens=^IF.*|^SRT\>.*|^REPEAT\>.*|^WHILE\>.*|^ELSE|^ELSE>
Let>decTokens=^ENDIF|^END\>.*|^UNTIL\>.*|^ENDWHILE.*|^ELSE|^ELSE>

//tokens to identify blocks to ignore
Let>inIgnores=^DIALOG\>.*|^VBSTART|^/\*.*
Let>outIgnores=^ENDDIALOG\>.*|^VBEND|\*/.*

//set tab chars
Let>tabs={"  "}

Let>numTabs=0
Let>inIgnoreSection=0
Let>outText={""}

//ask user for input script file
Input>scp_file,Select script file

If>scp_file<>{""}

  //create backup file name
  ExtractFilePath>scp_file,path
  ExtractFileName>scp_file,scp_name
  ExtractFileName>scp_file,scp_name_no_ext,1
  Let>backupfile=%path%\%scp_name_no_ext%.BAK

  //read in script lines to loop through
  ReadFile>scp_file,scp_data
  Separate>scp_data,CRLF,scp_lines

  //if there are lines, loop through them
  If>scp_lines_count>0

    Let>k=0
    Repeat>k
    
      Let>k=k+1
      Let>this_line=scp_lines_%k%

      //Message>To do: %this_line%

      //left trim the line 
      LTrim>this_line,trimmed_line

      //are we going into a section to ignore?      
      RegEx>inIgnores,trimmed_line,0,matches,pIgnore,0
      If>pIgnore>0
        Let>inIgnoreSection=1
      Endif

      If>inIgnoreSection=1
        //if we are in a section to ignore, are we coming out of it?
        RegEx>outIgnores,trimmed_line,0,matches,pIgnore,0
        If>pIgnore>0
          Let>inIgnoreSection=0
        Endif
      Else
        //otherwise we are not in an ignore section so see if we need to do anything  
      
        //should we unindent?
        RegEx>decTokens,trimmed_line,0,matches,dec_nm,0
        If>dec_nm=1
          Let>numTabs=numTabs-1
          //capitalise first letter while we're here
          MidStr>trimmed_line,1,1,fChar
          Uppercase>fChar,fChar
          RegEx>(^.{1}),trimmed_line,0,matches,nm,1,fChar,trimmed_line
        Endif

        //create the indent chars
        Let>indent={""}
        If>numTabs>0
          Let>t=0
          Repeat>t
            Let>t=t+1
            Let>indent=%indent%%tabs%
          Until>t=numTabs
        Endif
        
        //insert indent chars to line to output
        Let>this_line=%indent%%trimmed_line%

        //should we indent further lines?
        RegEx>incTokens,trimmed_line,0,matches,inc_nm,0
        If>inc_nm=1
          Let>numTabs=numTabs+1
          //capitalise first letter
          MidStr>trimmed_line,1,1,fChar
          Uppercase>fChar,fChar
          RegEx>(^.{1}),trimmed_line,0,matches,nm,1,fChar,trimed_line
        Endif

      Endif

      //output the new line 
      Let>outText=%outText%%CRLF%%this_line%

    Until>k=scp_lines_count

    //backup the file
    DeleteFile>backupfile
    CopyFile>scp_file,backupfile
    
    //write output to original file name
    DeleteFile>scp_file
    WriteLn>scp_file,res,outText
    
    MessageModal>Done! Backup saved to %backupfile%
  
Endif

The old script is renamed to a .BAK file so that your original script is backed up. So if there’s something I haven’t thought of in this first stab and something gets messed up, you can’t lose anything, but hopefully you are backing up your code already!

I’m ignoring code inside Dialogs and VBScript blocks as well as comment blocks. Dialogs shouldn’t be messed with and the indentation is handled by the dialog designer. VBScript could be cleaned up but would need a different parser and there are already VBScript code beautifiers out there so you could copy and paste those. So in this version I haven’t touched VBS blocks.

Hope this is useful. Any feedback or suggestions, or if you notice a bug, please post in the comments below.

The post PrettifyScp – Code Clean Up appeared first on Marcus' Macro Scheduler Blog.

Parsing XML with XMLParse and XPath

Version 14.5.5 update. Improved text capture, improved OCR, and more.

$
0
0

It’s been a while in the making, but we just released Macro Scheduler Version 14.5.5.
Registered users can download it here, and the trial version is here.

Version 14.5.5 15/10/2019

– Upgraded Python engine to Python 3.7.4 with ability to run Python 2.7 (PYTHON_DLL variable)
– Updated OCR engine to latest version of tesseract
– Updated native text capture engine
– Fixed: ArrayFind crashes if null array suffix provided
– Fixed: non existent subroutine cause script to end after error even if ignoring error
– Fixed: OCRArea incorrectly giving error on negative coordinates
– Fixed: Access Violation in OCRScreen for large screens (scaling has been removed for OCRScreen).

You should notice an improvement in OCR engine speed. Just this morning we tested OCRImage on a 1700 x 900 BMP image packed with text, and it extracted every character flawlessly in under three seconds.

The native text capture engine has been updated, improving the previous text capture capabilities.

One or two of you were asking about running Python 3.7, so we upgraded the engine to Python 3.7.4.

The post Version 14.5.5 update. Improved text capture, improved OCR, and more. appeared first on Marcus' Macro Scheduler Blog.

Happy Holidays Everyone!

Macro Scheduler 14.5.7 Update

$
0
0

We have today released Macro Scheduler 14.5.7 maintenance update.

Version History | Licensed Downloads

You will note that the user area no longer requests a password. Passwords will no longer be sent. Instead, on entering your email address a ‘magic link’ will be sent to you immediately in an email. Emails are usually pretty instantaneous. Once received, click on the link within and you will be logged straight into the user area.

The post Macro Scheduler 14.5.7 Update appeared first on Marcus' Macro Scheduler Blog.

Setting cell functions in Excel, plus a sneak peak!

$
0
0

Something that often gets asks is ‘Can I insert a function into Excel’ using Macro Scheduler‘s native XL functions?’.

Yes, you can. It may not be obvious from the documentation but with XLSetCell you can output any expression accepted by Excel. It doesn’t have to be a literal value.

You might set a literal value with something like this:

XLSetCell>xlH,Sheet1,2,2,560,result

In Excel you insert a function by starting the input with the ‘=’ sign, so we can do the same with XLSetCell:

XLSetCell>xlH,Sheet1,20,2,=SUM(B1:B19),result

In the same way we can force the cell to text format by preceding the input with an apostrophe:

XLSetCell>xlH,Sheet1,2,2,'560,result

These formats are standard Excel features. All we’re doing here is passing a value to Excel that it understands. But you may not have realised you can do this with Macro Scheduler’s native functions.

Coming Soon – More functions & run ANY VBA code!

A few people have requested more native XL functions. We’re working on it.

For example, a new function to set the cell colour:

RGB>50,150,50,color1
XLSetCellColor>xlH,Sheet1,13,2,color1

But how about being able to run ANY valid Excel VBA you like?

XLRunVBA>xlH,ActiveSheet.Range("B12").Interior.Color = vbRed

It could be a whole block of code:

LabelToVar>vba_code,theCode
XLRunVBA>xlH,theCode

/*
vba_code:
  Range("A1:B11").Select
  ActiveSheet.Shapes.AddChart2(201, xlColumnClustered).Select
  ActiveChart.SetSourceData Source:=Range("Sheet1!$A$1:$B$11")
  ActiveSheet.Shapes("Chart 1").IncrementLeft +50
  ActiveSheet.Shapes("Chart 1").IncrementTop -30
*/

These features are in development. Watch them in action here:

The sky is the limit!

Note: At time of writing these functions do NOT exist in the current version. These are in development. Their names and syntax may change. Keep an eye out for updates.

Be the first to get these new features by making sure your maintenance or subscription us up to date 🙂

The post Setting cell functions in Excel, plus a sneak peak! appeared first on Marcus' Macro Scheduler Blog.

WaitScreenImage now returns X and Y image position.

$
0
0

Did you know that as of Version 14.4.05, WaitScreenImage can also return x and y mouse coordinates of the found image?

The optional arguments x and y can be used to specify return variables which will store the position of the image found. This is useful as it means as well as waiting for a screen image you can interact with it without using a subsequent FindImagePos call.

Here’s a usage example :

//with position returned
WaitScreenImage>%SCRIPT_DIR%\save.bmp,0.7,CCOEFF,XArr,YArr
MouseMove>XArr_0,YArr_0

The post WaitScreenImage now returns X and Y image position. appeared first on Marcus' Macro Scheduler Blog.


Macro Scheduler 15 is Here!

$
0
0

I am really pleased to announce the release of Macro Scheduler 15.

As well as lots of small internal improvements, Macro Scheduler 15 brings native functions for automating the Chrome and Microsoft Edge browsers. We’ve also added some new Excel functions, including one that allows you to run any VBA code you like, making the native Excel functions infinitely extendable.

It was also time for a visual refresh…

Modern Web Browser Automation

With Macro Scheduler 15 we’ve introduced two sets of new web browser automation commands. One for Microsoft Edge and another for Google Chrome.

These functions use the new WebDriver interface, and connect to Chrome and Edge via Google’s ChromeDriver and Microsoft’s WebDriver or MS Edge Driver components.

Here’s a short video of Chrome being controlled with these new commands:

For more info see the help topics: Chrome Functions, Edge Functions.

Enhanced Excel Automation

More Excel functions has been a popular request. So we added some. The challenge though, is how to know when to stop. Microsoft’s Excel VBA is pretty unlimited. There’s no way we could wrap every possible function into a native Macro Scheduler one, so we needed a solution.

Well, for years now we’ve been able to convert Excel VBA into VBScript which can be run inside Macro Scheduler. But converting VBA to VBScript can be challenging. Instead, we thought it would be great if you could just pass any valid VBA directly into Excel. So now you can!

//run pure VBA code to set the color
XLRunCode>xlH,ActiveSheet.Range("B12").Interior.Color = vbRed

//could be an entire block of code - let's create a bar chart 
LabelToVar>vba_code,theCode
XLRunCode>xlH,theCode

/*
vba_code:
  Range("A1:B11").Select
  ActiveSheet.Shapes.AddChart2(201, xlColumnClustered).Select
  ActiveChart.SetSourceData Source:=Range("Sheet1!$A$1:$B$11")
  ActiveSheet.Shapes("Chart 1").IncrementLeft +50
  ActiveSheet.Shapes("Chart 1").IncrementTop -30
*/

You should be able to record a macro in Excel and then copy/paste the code it produces into Macro Scheduler like the above.

Downloads & Upgrades

Licensed Downloads/Upgrades | Trial Version | New Licenses

If you have a subscription visit your personal link sent to you in your welcome email.

The post Macro Scheduler 15 is Here! appeared first on Marcus' Macro Scheduler Blog.

Using Macro Scheduler 15’s Chrome Automation Functions

$
0
0

Macro Scheduler 15 now has native Chrome and Edge functions. You may be wondering how they work. There are a couple of sample scripts included with v15 but if you’re not sure how to get things set up or how to identify elements in the page this article is for you.

I wanted an example that wasn’t too involved but juicy enough to offer a few hurdles and demonstrate some features like xpath. I’ve set upon using Yahoo Finance to pull out the value of a stock symbol. Bear in mind that websites have a habit of changing so I can’t guarantee that the code in this article will work 6 months from now. But that shouldn’t matter much – it’s the principles of how to do this that matters most.

Before we begin make sure you are running Macro Scheduler 15.0.06 or above.

ChromeDriver

Before we can use the new Chrome functions we need to download the win32 version of ChromeDriver from: https://chromedriver.chromium.org

The zip file contains a single file: chromedriver.exe. Save this somewhere.

We need to tell the script where chromedriver.exe is. In my examples below I’ve got it in the root of drive C. So the first line of my script needs to be:

Let>CHROMEDRIVER_EXE=c:\chromedriver.exe

Start a Chrome Session

Now, we can start a Chrome session. To do this we use the ChromeStart function and give it a variable name that we want the session ID stored in. I’m using session_id. We’ll need this for the rest of the commands:

ChromeStart>session_id

Run your script and if your script is correctly pointing at ChromeDriver.exe you should see an empty Chrome window appear.

Navigating

To navigate to Yahoo add the ChromeNavigate command, passing the session_id to it:

ChromeNavigate>session_id,url,https://finance.yahoo.com/

Close the Chrome browser window (you don’t have to but running your script is going to start another) and run your script again.  This time you should see it navigate to Yahoo and show something like this:

Using Developer Tools

So the first thing we need to do is get past that “I agree” button. This is where Chrome’s Developer Tools comes in to help us find the element and the attributes we can use to identify it.

Right click on the “I agree” button and select “Inspect” at the bottom of the popup menu.  Chrome’s Developer Tools should appear. Usually at the bottom, but if you’ve used it before you may have changed the layout. It should appear in ‘Elements’ view and the highlighted element should be the “I agree” button:

Sometimes, I’ve found that the first time I select “Inspect”, if Developer Tools wasn’t already open, the element I want isn’t the highlighted one. Usually right clicking on the element and selecting Inspect a second time does the trick.

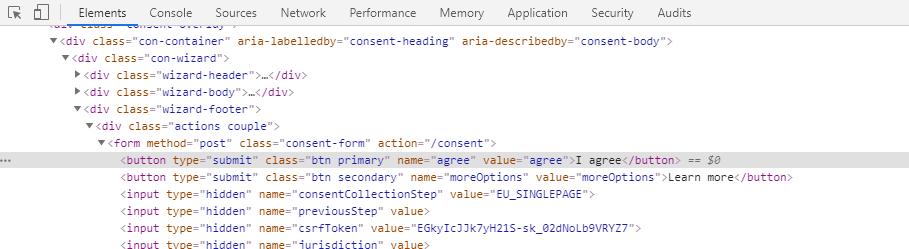
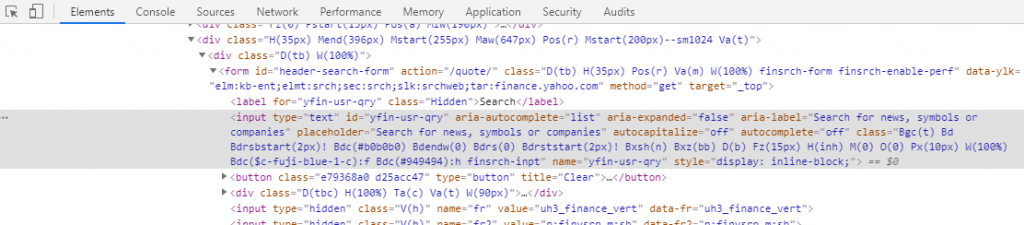
Another way to identify the element once Developer Tools is already open is to click the element selector button which you see at top left in the screenshot above. Then move the mouse to the “I agree” button and click.
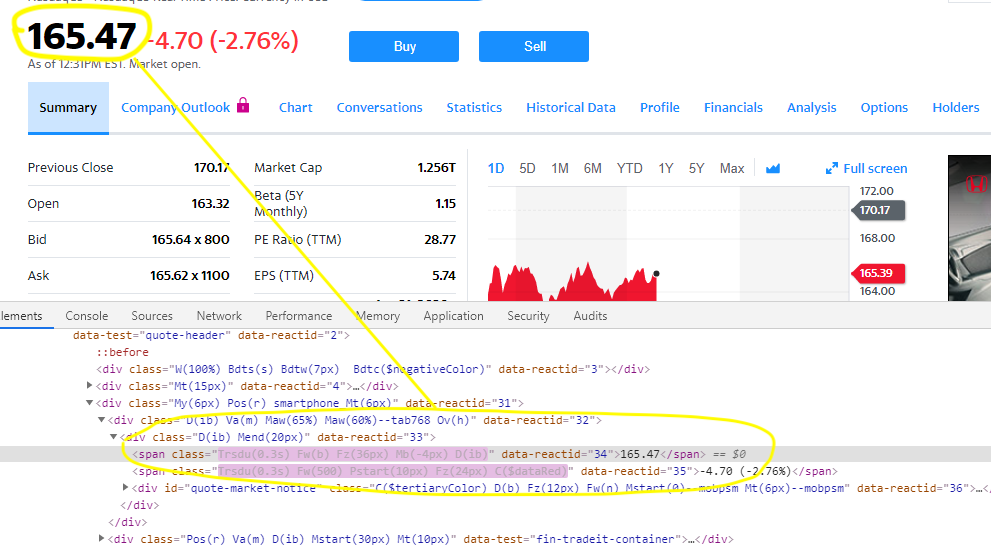
Once you’ve got the right element selected look for an attribute which we could use to identify it:

<button type="submit" class="btn primary" name="agree" value="agree">I agree</button>

Ideally we want something unique.That isn’t always possible and I’ll talk about what we can do in those cases later. Here we’re in luck. The element has a name – “agree”. We can use this to get a reference to the element so that we can then ‘click’ it:

ChromeFindElements>session_id,name,agree,agree_elements

Notice how we’re passing the session ID again (we want to make sure we’re referring to the Chrome window we started). The second parameter is the “Strategy” we want to use to identify the element. ‘Name’ is an available strategy – find the element by name. The third parameter is the strategy value. For ‘Name’ it’s the name itself which in this case is “agree”. Finally we give the command a variable name we’d like to store the located element IDs in.

Valid ‘strategies’ you can use are:

id, name, class name, css selector, link text, partial link text, tag name, xpath

Clicking on the Element

ChromeFindElements returns an array of matching elements. In this case the array should have only one item because there’s only one matching element. So the item we want is the first one: agree_elements_1.

Let’s use that to click on the button using the ChromeElementAction command:

ChromeElementAction>session_id,agree_elements_1,click

The script so far:

Let>CHROMEDRIVER_EXE=c:\chromedriver.exe
ChromeStart>session_id
ChromeNavigate>session_id,url,https://finance.yahoo.com/
ChromeFindElements>session_id,name,agree,agree_elements
ChromeElementAction>session_id,agree_elements_1,click

Close your browser window and re-run the script. Hopefully you’ll sail right through that I agree box.

ChromeDriver should wait for events to complete and pages to load before firing new events, but if you have any issues you may need to slow things down a touch. E.g. stick a Wait>1 before the click.

Sending the Stock Symbol

We now need to find that input box, enter something and submit it. Using the same ‘Identify’ technique as described above you should find that the input element has its “id” attribute set to “yfin-usr-qry”:

So we’ll use that:

ChromeFindElements>session_id,id,yfin-usr-qry,input_elements

I’ve used input_elements as my array name for the found elements. We now want to enter some text. Let’s search for Microsoft which is stock symbol “MSFT”. To do this we’ll use the ChromeSetElementValue command. There’s only one matching element again so as above we use the first match input_elements_1:

ChromeSetElementValue>session_id,input_elements_1,MSFT
Wait>1

Notice this time I have put a wait afterwards. The next step is to ‘submit’ the field. I found that submitting it without the wait didn’t allow enough time for the entry to ‘take’. There could be some background processing going on which needs time to finish. Remember, as with most automation, we’re automating something that was designed for a user, and Robots run faster than users, so sometimes need slowing down!

We will now use the ChromeElementAction command again, this time with the submit action:

ChromeElementAction>session_id,input_elements_1,submit

Instead of doing this we could have found the search button and issued a ‘click’ on that. But that would require another ChromeFindElements which in this case is unnecessary. We can ‘submit’ the input directly.

Extracting The Stock Value

Rerun the script and you should end up looking at the Microsoft stock info which we want to extract.

Tip: rerunning the script from the top every time isn’t ideal. We’ve got the Chrome window open so the session is still active. So what you could do if you just want to run and test a few commands is grab the session ID from the watch list and assign it with a Let statement placed just before the commands you want to test. E.g:

Let>session_id=b6976cfec0326dcce35ad3674c3ed90e
ChromeFindElements>session_id,id,yfin-usr-qry,input_elements
ChromeSetElementValue>session_id,input_elements_1,MSFT

This is where things get a little more interesting. Use the inspect element tool to locate the element as above. You’ll see it’s a span element. You might also notice the class keeps changing. This site is very dynamic, updating as the stock value changes. In this instance we aren’t lucky enough to have an id, or a name. But notice those custom ‘data-reactid’ attributes.  You’ll see that they all have different values, and the one we want is “34”.  Let’s see if we can use that.

Now, ‘data-reactid’ is a custom attribute. It’s not standard html, and there’s no ‘strategy’ called that. So we’re going to use something called ‘xpath’. xpath is incredibly powerful and can help us find pretty much anything. There’s a great tutorial on xpath here.

We need to find a ‘span’ element with attribute data-reactid which is set to “34”. In xpath we can do this with:

//span[@data-reactid='34']

The // means find nodes regardless of where they are – we don’t need to provide a path. The @ symbol is used to specify an attribute. And we’re giving it a value. We’re saying find a span element with attribute data-reactid set to value “34” and we don’t care where it is.

So we can use this in the ChromeFindElements command as follows:

ChromeFindElements>session_id,xpath,//span[@data-reactid='34'],info_elements

Now, before we continue we should confirm whether or not this is the ONLY span tag with this attribute and value. We could do that either by searching the source using Chrome’s element inspector, or, I think easier, just debug the code to see what we get back. Stick a breakpoint just after this line, run the script and then look at the watch list. You’ll see there are two:

Now, we’re going to need to extract them to see which is the right one. We’re going to use the ChromeGetElementData command:

ChromeGetElementData>session_id,info_elements_1,text,stockValue

If you step through this command and look at the value of stockValue in the watch list, you’ll notice that info_elements_1 is not the one we want. We want the second one:

ChromeGetElementData>session_id,info_elements_2,text,stockValue
MessageModal>Value is %stockValue%

So there we have it. We’ve started Chrome, navigated to Yahoo Finance, clicked ‘I agree’, searched for MSFT and extracted the stock value.  We might want to close the Chrome window at the end:

ChromeQuit>session_id

Here’s the full script:

Let>CHROMEDRIVER_EXE=c:\chromedriver.exe

ChromeStart>session_id
ChromeNavigate>session_id,url,https://finance.yahoo.com/

ChromeFindElements>session_id,name,agree,agree_elements
ChromeElementAction>session_id,agree_elements_1,click

ChromeFindElements>session_id,id,yfin-usr-qry,input_elements
ChromeSetElementValue>session_id,input_elements_1,MSFT
Wait>1

ChromeElementAction>session_id,input_elements_1,submit
Wait>1

ChromeFindElements>session_id,xpath,//span[@data-reactid=’34’],info_elements
ChromeGetElementData>session_id,info_elements_2,text,stockValue
MessageModal>stockValue

ChromeQuit>session_id

Using Edge instead of Chrome?

The Edge commands work in exactly the same way as Chrome. And finding elements in Edge is done in exactly the same way. So you should be able to adapt the above code to work with Edge very easily. The main difference is that Edge is a bit more picky when it comes to installing the correct version of Edge Driver.  And if you have an older ‘legacy’ version of Edge you will need to install Microsoft Web Driver instead of MS Edge Driver.  The manual explains how.

Conclusion

The Chrome and Edge functions are incredibly powerful and finding elements using Chrome’s, or Edge’s, Developers Tools is quick and easy. There’s also a lot more that you can do, such as grab the entire source of the page. I hope this has been useful. Let me know in the comments below how you are using these functions.

You’ll find more info in the manual. See Chrome Functions and Edge Functions.

If you have any questions find me on the forums or drop us a line.

The post Using Macro Scheduler 15’s Chrome Automation Functions appeared first on Marcus' Macro Scheduler Blog.

MacroScript SDK and Workflow Designer Updated for MacroScript v15

Working with Frames in Chrome and Edge

$
0
0

The new Chrome and Edge functions in Macro Scheduler 15 make it possible to locate frames and iframes and then manipulate elements within them.

Switching Frames

The ChromeSwitchFrame and EdgeSwitchFrame functions allow you to specify a frame or iframe element, by index or element reference, to switch the “browsing context” to.

What this means is that any subsequent interactions will take place against elements within that frame. So a subsequent ChromeFindElements call will attempt to locate the specific element within the frame, rather than the parent page, and ChromeElementAction will act against the given element within that frame.

//Find the frame using xpath
ChromeFindElements>sessionID,xpath,//iframe[@src='/contact-form/formpage.html'],elements

//switch browsing context to this frame
ChromeSwitchFrame>session_id,element,elements_1,res

If xpath doesn’t mean anything to you see my recent post Using Macro Scheduler 15’s Chrome Functions which includes an explanation of using Chrome’s Developer Tools to identify elements.

At some point you may need to switch the browsing context back to the parent frame. To do this you call ChromeSwitchFrame/EdgeSwitchFrame again with a null index. Subsequent calls to the Chrome/Edge functions will then act against the parent frame.

ChromeSwitchFrame>session_id,index,null,res

Traversing Frames

Since each time you switch frames you change the context to that frame, calling ChromeSwitchFrame or EdgeSwitchFrame again (on a valid frame element within) will switch the context down another level.

//Find the frame using xpath
ChromeFindElements>sessionID,xpath,//iframe[@src='/contact-form/formpage.html'],elements
ChromeSwitchFrame>session_id,element,elements_1,res

//Switch to the next frame down *within the current frame*
ChromeSwitchFrame>session_id,index,0,res

Differences between Edge and Chrome

The Edge and Chrome functions work in the same way and are almost identical. There’s one major difference when it comes to switching frames. When specifying an element (rather than index) ChromeSwitchFrame requires the element ID, whereas EdgeSwitchFrame requires the full element object. As well as an array of element IDs, EdgeFindElements returns a second array of the objects:

EdgeFindElements>sessionID,xpath,//iframe[@src='/contact-form/formpage.html'],FrameElements

This returns two arrays prefixed with the name passed as the return var (TheElements): FrameElements_1 … FrameElements_n and FrameElements_objects_1 … FrameElements_objects_n. For EdgeSwitchFrame use the second _objects array:

//switch to the frame
EdgeSwitchFrame>session_id,element,FrameElements_objects_1,res

More Help

View the Chrome Functions and Edge Functions topics in the Macro Scheduler Manual.

Full Example:

Let>CHROMEDRIVER_EXE=c:\chromedriver.exe

//start a Chrome session
ChromeStart>session_id

//navigate to google.com
ChromeNavigate>session_id,url,https://www.mjtnet.com/contact.htm

//Find the frame
ChromeFindElements>sessionID,xpath,//iframe[@src='/contact-form/formpage.html'],elements

//switch to the first frame (the one with the fields)
ChromeSwitchFrame>session_id,element,elements_1,res

//now anything we do is inside that frame so we should be able to get the name field and enter something
ChromeFindElements>session_id,id,name,inputs
ChromeSetElementValue>session_id,inputs_1,john doe

//Switch context back to parent
ChromeSwitchFrame>session_id,index,null,res

The post Working with Frames in Chrome and Edge appeared first on Marcus' Macro Scheduler Blog.

Using Macro Scheduler to Bridge Desktop Apps and Cloud – Case Study

$
0
0

Are you automating web apps, or interacting with APIs?

Macro Scheduler is packed with features that help with automating desktop applications and simulating user input. But it also has great support for consuming web resources via HTTP requests, as well as built in functions for automating modern web browsers.

“Being able to move between GUI and API methods to handle our automation needs is priceless”

Find out how IT services company Cloud2T uses Macro Scheduler to bridge desktop and modern API driven cloud services. Read the case study here.

The post Using Macro Scheduler to Bridge Desktop Apps and Cloud – Case Study appeared first on Marcus' Macro Scheduler Blog.

Sending Keystrokes to Elements in Chrome and Edge Using the New Chrome/Edge Functions

$
0
0

It may not be immediately obvious that as well as setting the value of elements with ChromeSetElementValue and EdgeSetElementValue you can also send non-character keystrokes, such as Enter, or Page Down.

To do this, use the key codes for Edge and Chrome listed here.

For example:

ChromeSetElementValue>session_id,message_elements_1,First line
//Press enter on the element ... 
ChromeSetElementValue>session_id,message_elements_1,\uE006
ChromeSetElementValue>session_id,message_elements_1,Second line

Note that when sending keystrokes only one can be sent at a time.

Recently someone needed to scroll down inside a div, in order to force the page to fetch more data. Issuing a Page Down on the div element did the trick:

ChromeSetElementValue>session_id,div_elements_1,\uE00F

So, ChromeSetElementValue sends keys as well as sets values – perhaps it should have been called ChromeSendKeysToElement and just maybe we’ll add that as a mapping if it helps.

Of course you don’t have to use the new Chrome/Edge functions – you can still use UI methods and use SetFocus, SendText and/or Image Recognition to locate page elements.

The post Sending Keystrokes to Elements in Chrome and Edge Using the New Chrome/Edge Functions appeared first on Marcus' Macro Scheduler Blog.

Covid-19 Response – Free Macro Scheduler Licenses for NHS Establishments

$
0
0

We find ourselves in challenging times. Things here in the UK seem to be changing rapidly every day. Only last night we heard that our schools will close tomorrow and this morning it was announced they were likely to remain closed for the rest of the academic year. So no school until September. I am already working from home. All of us here at MJT are working remotely, so we’re all safe and able to support you. But with two boys at secondary school I am now preparing for having them both at home and having to make sure they do their work while trying to do mine. Could be interesting!

Clearly though, the biggest challenge is being felt by our amazing health service, which is under incredible pressures. So, where possible I’d like to offer any NHS establishment free use of Macro Scheduler while this crisis lasts. If you work for the NHS and would benefit in using Macro Scheduler, or require additional licenses, please contact me using your NHS email address, tell me what you need Macro Scheduler for and we will see how we can help.

We’ve worked closely with a few NHS trusts over the years. In particular, Bournemouth Hospital has used Macro Scheduler extensively to automate dozens of clinical and administrative processes within the trust. You will find a case study we did with them a few years ago here. Many times Macro Scheduler has been used to streamline processes that save the time of clinicians. And that can mean more patients get seen.

The post Covid-19 Response – Free Macro Scheduler Licenses for NHS Establishments appeared first on Marcus' Macro Scheduler Blog.


Assisting the UK National Health Service

$
0
0

We find ourselves in challenging times. At MJT Net we’re all working from home, with the difficulty of trying to educate and entertain our children at the same time.

Of course there is also a great deal of financial uncertainty. Businesses and people everywhere are feeling the pinch, ourselves included.

Clearly though, the biggest challenge is being felt by our amazing health services, which are under incredible pressures.

Behind the scenes, healthcare IT departments are working against the clock, often with huge volumes of data. So it’s great to know that Macro Scheduler is reducing the burden during the current crisis.

Here’s what Tom, a Clinical Systems Developer at an NHS hospital in Northern England, told us last week:

“In a crisis situation, we needed a straightforward automation tool which could help us make quick changes to a wide range of systems – without time to write API code. We found that Macro Scheduler more than fit the bill: it rapidly enabled us to automate repetitive tasks and to free up needed resources – ultimately giving us the time to better support our clinical staff in fighting coronavirus. In particular we have been very impressed with its ability to easily integrate with Google Chrome – like many organisations a lot of our tools are web-based and our ability to build automation into these workflows is a real game-changer.”

If you work for a hospital on the front-line of coronavirus care and would benefit in using Macro Scheduler, or require additional licenses, please contact me using your official work email address, tell me what you need Macro Scheduler for and we will see how we can help.

We’ve worked closely with a few UK hospital trusts over the years. In particular, Bournemouth Hospital has used Macro Scheduler extensively to automate dozens of clinical and administrative processes within the trust. You will find a case study we did with them a few years ago here. Many times Macro Scheduler has been used to streamline processes that save the time of clinicians. And that can mean more patients get seen.

The post Assisting the UK National Health Service appeared first on Marcus' Macro Scheduler Blog.

Macro Scheduler, my lockdown assistant.

$
0
0

The world has changed during the past 9 weeks or so, and some of the MJT staff have been putting Macro Scheduler to good use to help them during lockdown.

Soon after lockdown was announced people began panic buying, and grocery store delivery slots would all be claimed within moments of being released. For those of us with vulnerable people at home and no family nearby, our only hope was securing regular delivery slots – and buying a freezer! But with thousands of people competing for those rare delivery slots and all online appliance outlets completely sold out of freezers, it was an uphill battle.

But Macro Scheduler came to the rescue.

One simple automation script monitored a handful of web pages 24/7, refreshing every minute or so. It watched our local Supermarket looking for slots, and it monitored the white-goods stores waiting for any one of half-a-dozen freezers to be re-stocked.

A few days went by. No luck. Was this going to work? Would there ever be any slots? On day 6 I received a text on my phone – I’d been smart enough to use Zapier so Macro Scheduler would notify me via text wherever I may be.

A freezer had become available on the John Lewis website! We scurried over to the laptop and hurriedly clicked on the link. It’s no exaggeration to say our hearts were in our mouths. This was important! We didn’t even read the description. We just needed a freezer. Added it to our cart. Paid for it. Got the confirmation email. A few seconds later none were available again. We had successfully managed to purchase a freezer during the few minutes one online retailer had some.

Since then, over the past 8 weeks or so we used Macro Scheduler to tell us when those supermarket deliveries are available. They only pop up once or twice a day if we’re lucky – but when they do, we hear our little notification beep and off we run to the laptop and start shopping! It has been a Godsend, and it hasn’t failed us yet. Thanks to Macro Scheduler we top-up our little freezer every two weeks, and lockdown has been largely worry-free.

The process was simple. Here are some of the commands we used. IECreate, IENavigate to get us to the pages we were looking for and IEGetAllText helped us scrape the text from the page, then we used Position to see if the text we were looking for was, or wasn’t, on the page. All contained in a nice little loop, watching and waiting 24/7.

The post Macro Scheduler, my lockdown assistant. appeared first on Marcus' Macro Scheduler Blog.

Recording Excel macros for Macro Scheduler

Automating Windows 11 with Macro Scheduler

Macro Scheduler 15.0.20 Available

$
0
0

Seasons greetings!

Last week we released Macro Scheduler maintenance update 15.0.20:

  • Added: ChromeGetWindows, ChromeSwitchWindow, EdgeGetWindows, EdgeSwitchWindow functions
  • Added: Copy Let assignment option to watchlist menu (creates Let>variable=value on clipboard)
  • Fixed: edge case with some strings not being quoted properly in variable expressions
  • Updated: changed PPI zoom cut-off for larger icons

Trial downloads | Registered Updates

The post Macro Scheduler 15.0.20 Available appeared first on Marcus' Macro Scheduler Blog.

Viewing all 184 articles
Browse latest View live